widget
|
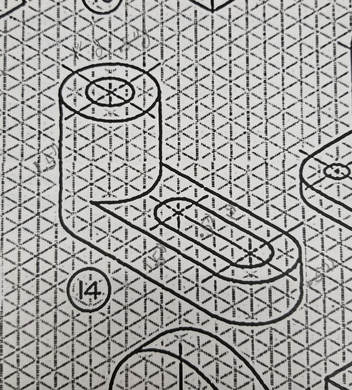
We were given a sketch of this widget to create in Inventor and cut out on the CNC Mill. We had to make the taller part a little shorter than it is in the sketch so that the bit on the mill could go all the way through.
|
|
inventor
|
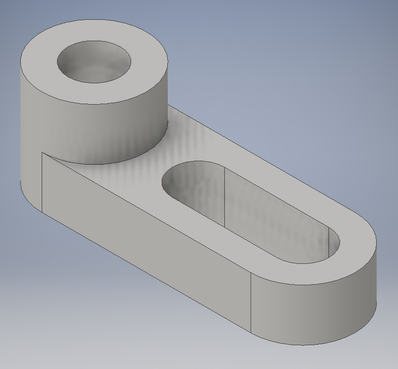
So I made the base of it first, then I added the tall part.
|
|
|
Then I cut the holes out.
|
|
Fusion 360
|
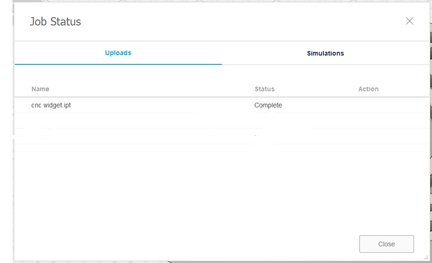
First I uploaded my file to Fusion 360.
|
|
|
I set it to CAM and went to setup to change how the file was orientated.
|
|
|
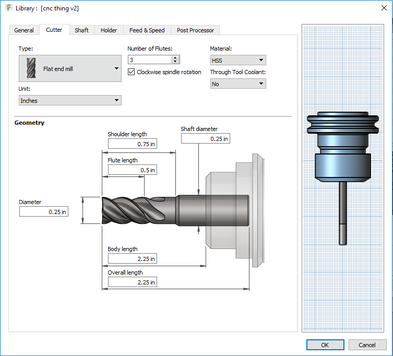
Then I selected 3D Pocket. I set the tool to be a flat end, 0.25 in. in diameter, and 2.25 in. body length.
|
|
|
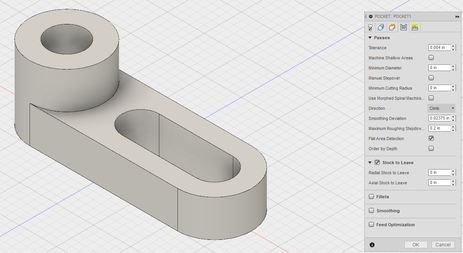
I clicked the top edges of the holes. I changed the Passes settings so Max. Step down is 0.2 in. and Stock to Leave 0 in.
|
|
|
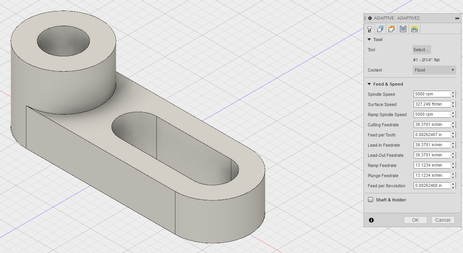
Then I selected 3D Adaptive Clearing and clicked the top and bottom outside edges.
|
|
|
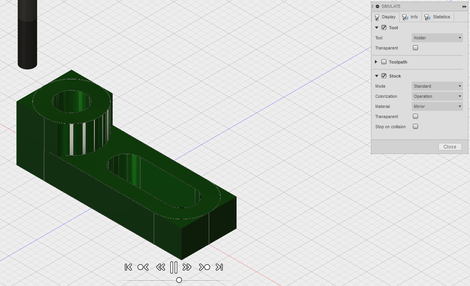
Then clicked the setup that I made earlier and then pushed simulate to see if it will cut the widget out correctly.
|
|
|
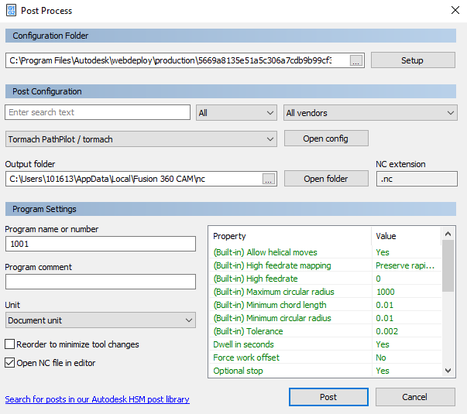
Then when it was cutting out correctly I clicked Post Process. Selected Tormach Path Pilot. Then I clicked post at the bottom and saved it to my H-drive.
|
|
Mill
|
I uploaded the file to the computer.
|

|
|
I cut a piece of material that was 3 inches long and put double sided tape on and put it in the machine. I then moved the bit of the machine to where the origin is on my file.
|

|
|
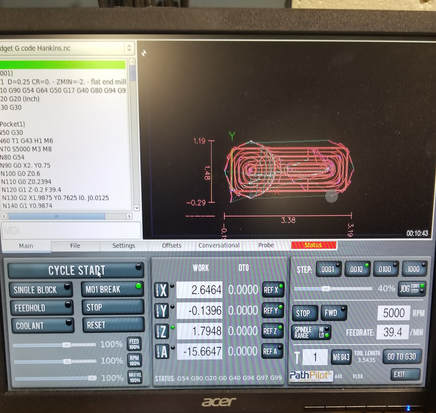
I zeroed X, Y, and Z. I hit reset and then clicked Cycle Start to start the machine.
|
|
|
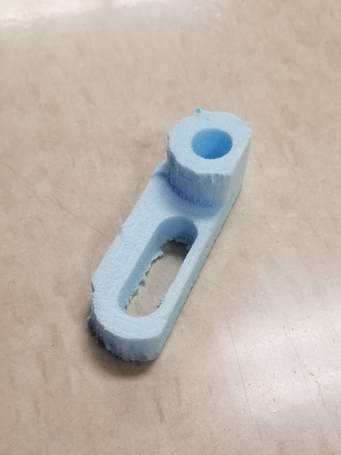
When the machine was done, I took the widget out. It is a little flat on one side because I didn't center the bit perfectly.
|
|
